Here is the guide to using the Recruitment Management System (RMS) :
First, log into your employer's account and if you need to create an account on merojob as an employer. You can do this by visiting the merojob website and clicking on the "Employer Zone" button. Follow the prompts to create your account.
Be sure that you fulfill your organization profile before you post a job.
Once you have created an account, you can post a job opening by clicking on the "Post a Job" button. Fill in the details of the job, such as the job title, location, salary, and qualifications required.
After your job post has been approved and set live on the merojob homepage you will start receiving applicants.
The process of sorting and shortlisting comes once there is a flow of applications on your job post. And that is where the Recruitment Management System (RMS) comes in handy.
To start using the RMS, you can log into your employer account.

Click on the "Manage Jobs" tab located on the top right side of the page. This is where you can filter and manage your job listings effectively.

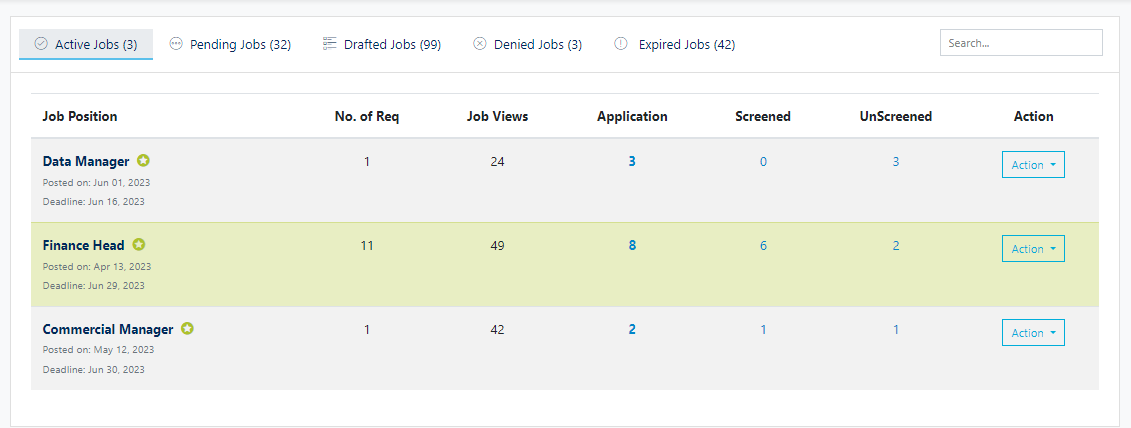
Within the "Manage Jobs" tab, there are five tabs to choose from:
Active Jobs: This tab displays the job postings that are currently live on the merojob homepage and receiving applicants.
Pending Jobs: This tab shows the job posting that is awaiting approval from the CRE (Client Relations Executive) to be made live on the merojob homepage.
Drafted Jobs: Job posting details that are incomplete or still in the draft stage are listed under this tab.
Denied Jobs: This tab displays the job posting that has been rejected by the job portal for not meeting specific criteria or guidelines.
Expired Jobs: This tab shows the jobs that are no longer active or available for application.
